image

image

Thursday, July 26, 2018

Mangalore Mask- The Fifth Element


I decided to make  mask of the Mangalores from The Fifth Element, a group of characters that I had always liked growing up, even though they were completely ridiculous.


I got myself some good screencaps from the blu ray and set about sculpting the mask in water based clay on top of a generic human form. I decided to sculpt a random Mangalore, instead of aiming for one specific one. Looking at the movie it seems that there were at least 4 headsculpts for the background characters, and then the lead character Aknot. I decided to go with a closed mouth pose for this first mask as it would be easier.


 Photos of the finished clay sculpt


 I didnt have time to fully document the moulding process, but here is a picture of the mould wall, half way through moulding


Raw latex cast straight from the mould on the left, and on the right is the same mask all trimmed and cleaned up.


after a few evenings of painting, here is the final mask, with the eyeholes now cut out


Now i need to sculpt some hands to go with the head!

Alien Mask color variants

some better color photos of my mask from the previous post, with an additional new color variant.


Thursday, July 19, 2018

Latex monster Mask

Its been a while since I have made anything using Latex, more than a while actually, it was  2008 when I made my last mask.

I had an idea for an alien character, with aquatic influences.

I started roughing out a half mask, building on top of a plaster lifecast to bulk out the shape


adding more details..


final sculpt.


Here is the first latex pull from the mould, pretty happy with the quality.


working into the paint scheme


Final paint scheme


Monday, March 26, 2018

Blog Resurrection

Its been nearly 2 years since I updated this blog, I'm not sure if there are any followers still watching it, but I felt like it was time to give an updated with aims to keeping the blog alive. For future posts I will keep in depth articles here, and just images and previews on my Instagram account etc.
I also have a portfolio site now that I will keep updated with Finished artwork

So, whats been happening over the two years??

Here are a selection of projects I've completed in no particular order..


3D printed character busts

Various characters of my own design printed out and then moulded/cast in resin.

Album here for this guy


Here is a character who was a clay sculpt combined with 3D printed elements..
Album here


I have also been getting back into scale modelling, and also kitbashing, here are two concept models that were just recently finished

'The Harvester'- full album

And the Walker Drone- Album


3D printed chainsword- I modelled this in Zbrush, and printed it out on my Ultimaker 2, then spent a good while sanding and painting it.
View an album here

3D printed District 9 Rifle- I downloaded this model from 'MyMinifactory' and then practiced my sanding and finishing techniques on it.
Album here and also a Build album


Thursday, January 21, 2016

Instagram account

I have a new instagram account that you can follow me on!
https://www.instagram.com/druham/
Its a little more regularly updated than the Blog, but I will still post big stuff and progress stuff here also
Thanks!

Thursday, January 14, 2016

January Update; New Year, New Stuff!

 Kicking off the new years Bloggage with some bits and pieces I've been working on.

Zombie- 2016 version
I poured some Molten chavant into the old Zombie animator mould from 2014, and then completely re sculpted the bust, re positioning the head, and fixing issues with proportion. pretty happy with the progress so far, I feel that I have learned loads in the past year

 Mini Alien face
Quick speed 'sketch' in clay of an alien, I'm gonna make a quick mould of this and make fridge magnets out of him!

 Alien Bust update
More progress being slowly made with the larger bust. made a mould of the headpiece and cast out a fiberglass version (in grey) and set that into the sculpture, then i roughly attached the nodes and began incorporating the whole thing together.


as winters are cold in the shed and I'm planning on a 3D printer in 2016, I started designing some armour for the bust in Zbrush, will post more on that in the coming weeks.


Thanks for reading!

Wednesday, November 4, 2015

Various updates, October Bank Holiday

Thought I'd share a selection of updates from various bits and pieces I have been working on in my studio over the long weekend... Read on!

Studio update:
Studio/workshop is pretty much completed now! woo hoo! its nice to look back and see what the garden  looked like before.


While working in the workshop recently I started using Polyester resin and fiber glass again, and the fumes from the buckets even when closed were so bad (i had extractor fans and windows open every evening) I took steps to ensure my lungs stayed healthy by getting a waterproof exterior storage chest, which I lined with insulation, now I can keep my buckets of resin and gelcoat safe and sound without being slowly poisoned .....


Halloween costume-abandoned:
Sadly I didn't make it into Brown Bag this year for the costume party, as it was at the end of my weeks holiday, I instead decided to relax and work on some other stuff, including gardening and DIY stuff in the house. I had made progress on a costume however, I was planning on going as the terrifying clown from American Horror Story Freakshow, click these words to see what he looked like in the show.
I sculpted his face mask on a cast of my own face, and moulded it out in silicone, and then cast it in resin. you can see the progress below. I'd like to finish this one for Dublin comic Con or next Halloween, apart from the human scalp hat, the rest of the costume is a job for the sewing machine.


Alien Bust update
I've been slowly making progress with this guy, trying to get his headpiece finished so that i can mould and cast it to add to the main sculpture. I've also been toying with the ideas of adding a spiny goatee to the character also, not sure if this will stay or not, just playing around with different ideas.


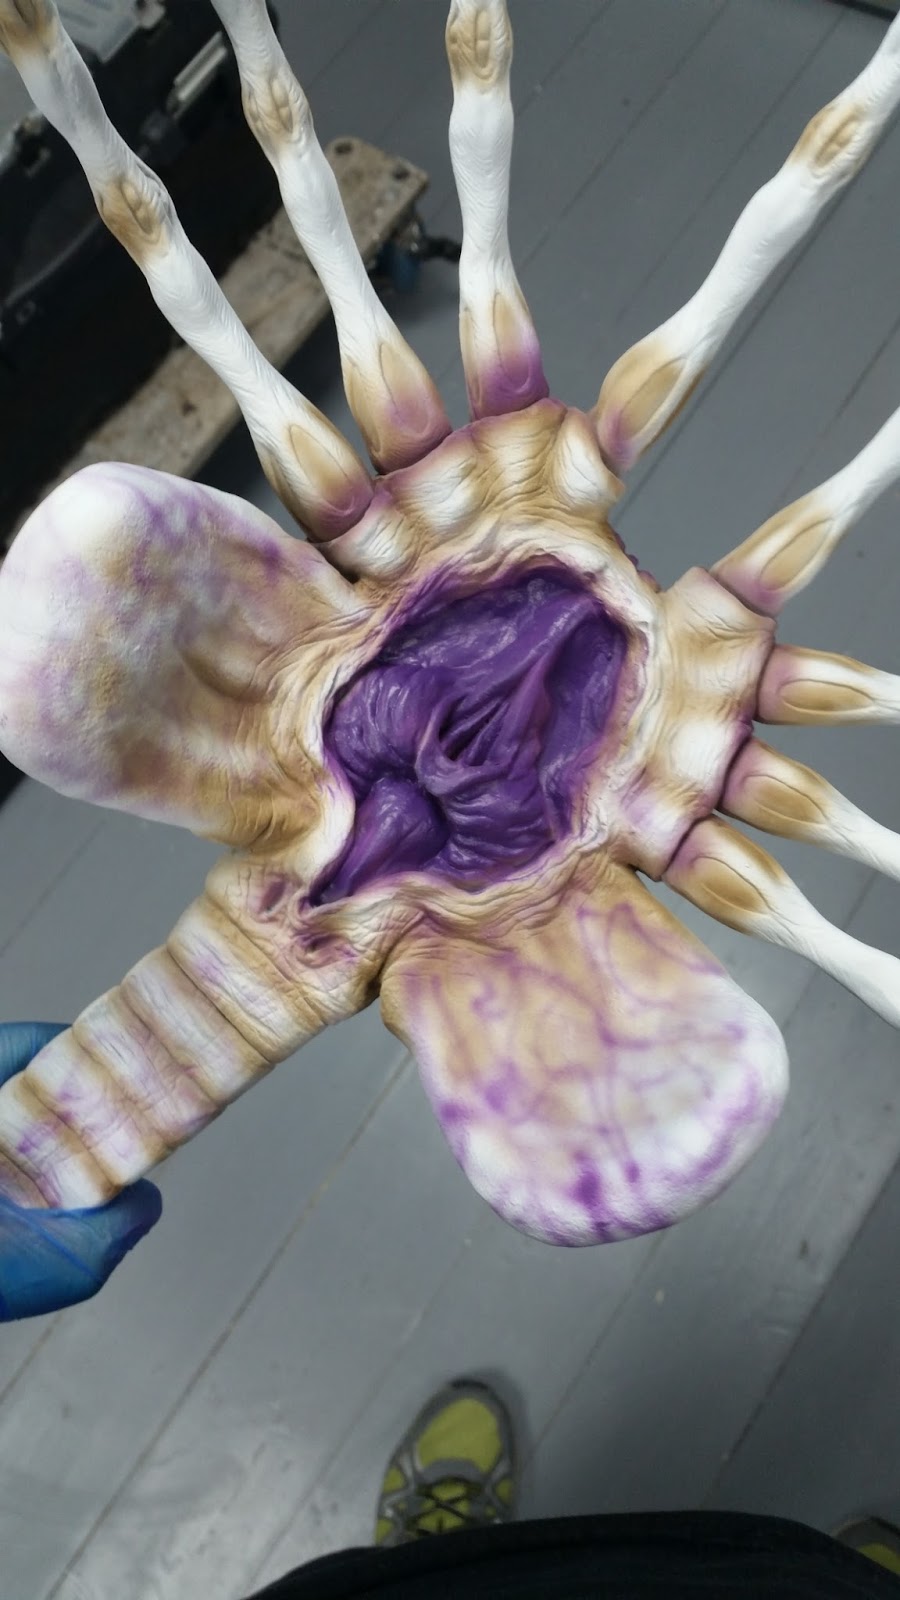
Facehugger Model kit
Getting back into some painting with this life size vinyl model kit I got on Ebay. Pretty neat kit, just needed some heat gun action to fix some warped sections, also some model putty filler to fill some large gaps.
you can see the painting process below, I like to do really contrasting shadows/veins as base layers and then do overall coats of a solid color to blend them together,with hints of the shadows and veins showing through. nearly finished this guy, will post more soon